Introduction
A few months ago, a customer asked me to develop a portable spectroscopy system with the following requirements:
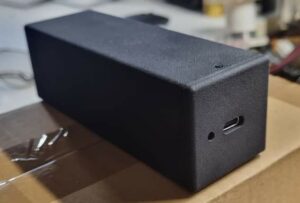
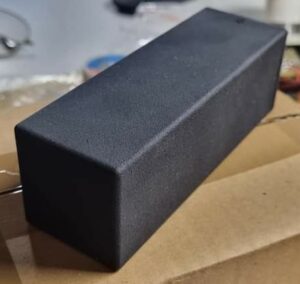
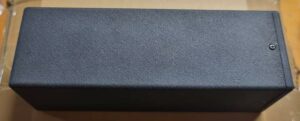
- Portability: The design measures 25x25x50mm, featuring a 7.5% CsI(Tl) crystal that is hand-polished and enclosed in a specialized reflector.
- 100% Solid State: No PMTs! Instead, four 6x6mm MicroFC SiPMs are used.
- Compatibility: The system should be compatible with BecqMoni, Theremino, and PRA. The audio CODEC from T.I., PCM29xx, was chosen.
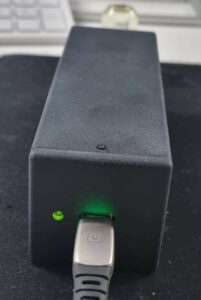
- No Tune: The device is designed for simplicity, requiring no complicated controls. Just plug in the USB-C cable and set the line-input level.
- Elegant Design: It boasts a classical ‘black monolith’ geometric shape, 3D printed in Nylon carbon reinforced by the Xometry service. While I am not affiliated with them, their high prices are matched by the high quality of their parts and support.
The prototype realization
The construction of this device followed these steps:
- Designing the enclosure with FreeCAD, based on the dimensions of the crystal.
- Creating the electronics design, schematics, and PCBs in Eagle CAD.
- Committing the PCB manufacturing to Aisler.
- Assembling the PCBs.
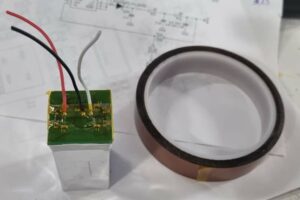
- Mounting the SiPMs on the daughter board and coupling them with the crystal.
- Assembling and testing the system.
- After full validation of the system, sending the design for the 3D printed enclosure to Xometry.
- Conducting the final assembly and testing.
1. Enclosure
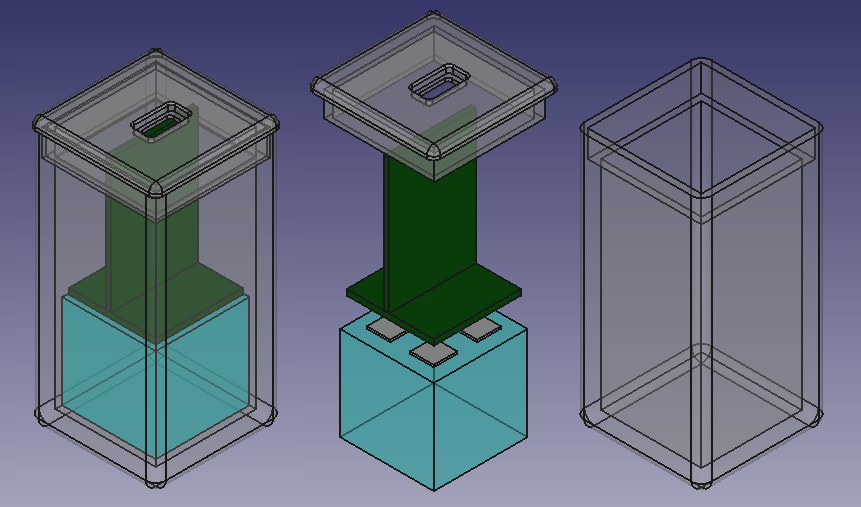
FreeCAD is impressive! I strongly recommend giving it a try. At first, it may not seem intuitive, but after a couple of hours of tinkering with it, you can achieve these kinds of results.
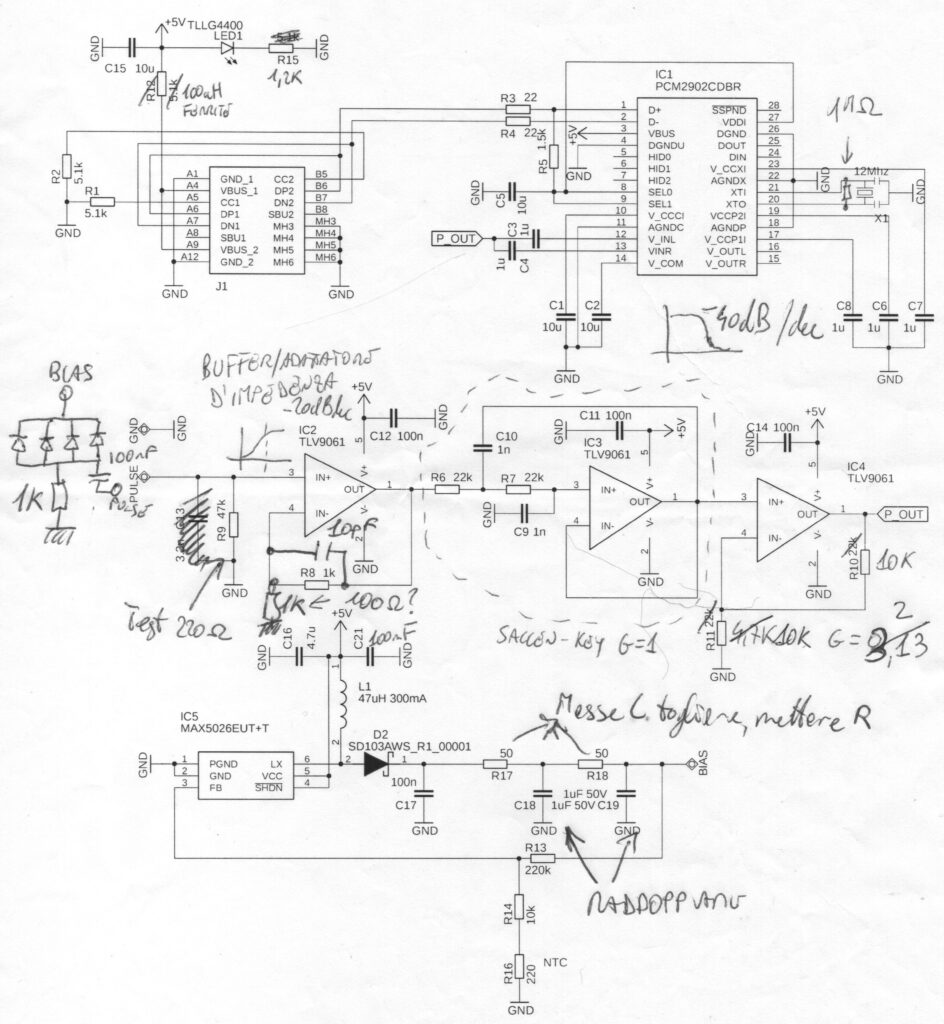
2. Schematics
The schematic has some annotations on it that were determined empirically during the testing of the circuit.
4. Assembly of PCBs
It’s standard SMD technique: I’m using a stencil and solder paste. After applying solder paste to the SMD pads, I place the components and then ‘cook’ the PCB in an infrared solder reflow oven. Alternatively, I use a hot air blower.
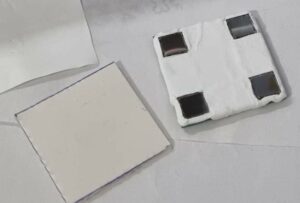
5. SiPMs assembly on daughter board
This is a tricky job! Soldering PCBs worth 300€ (75€ each x 4) is a task not to be undertaken lightly. The SiPM should receive as little heat as possible; its optical surface must remain clean and free from flux!!! For this reason, I’ve designed the SiPM package in Eagle CAD with solder pads long enough – 2mm excess from all sides of the SiPM – to apply heat with my soldering station tip from there, without even touching the SiPM. In practice, after I’ve covered the pads with the right amount of solder paste, I carefully place the SiPM. Touching the pad with the soldering iron causes the paste to melt and reflow under the SiPM contact, soldering it correctly in place.
I’ve not used hot air or IR reflow oven for this task!

The coupling with the crystal is simply achieved using a special optical coupling, thick, double-sided tape. Alternatively, optical coupling grease can be used. The important aspect here is to cover the PCB around the SiPM with PTFE to complete the optical reflector layer.
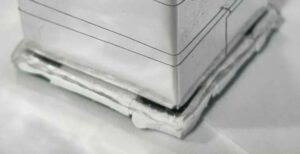
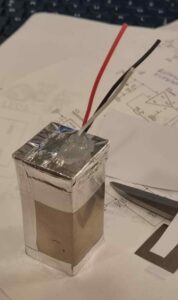
Finally, the connection wires were soldered onto the back of the SiPM daughter board, and the whole assembly was sealed with a layer of aluminum tape and a layer of 0.1mm thick mu-metal foil. Some automotive-grade gray silicone was used to secure the silicone-insulated connection wires in place and prevent any force applied to the wires from breaking the soldering pads. A layer of Kapton tape insulates the soldering pads from the aluminum tape.
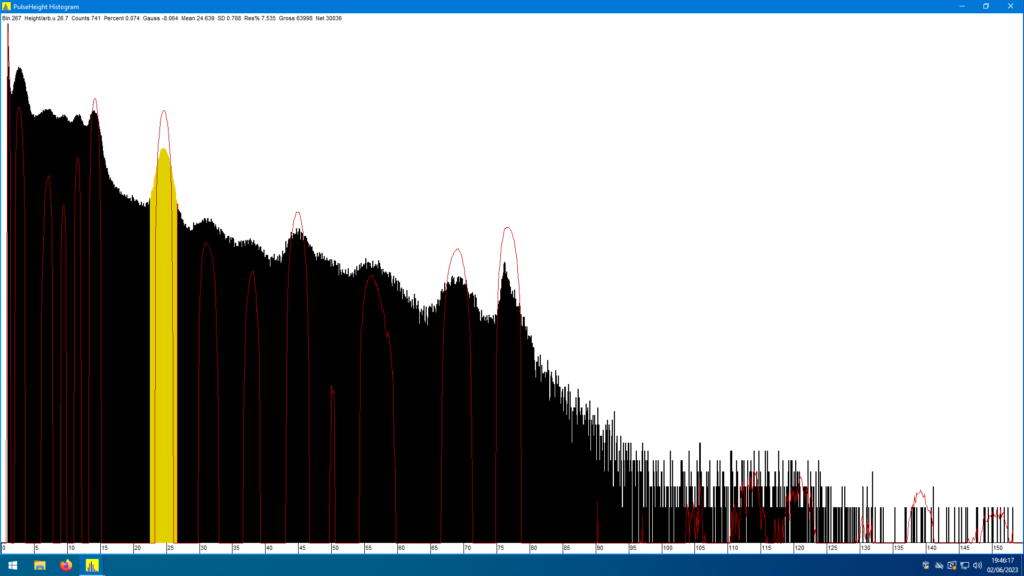
6. Assembly and testing for validation
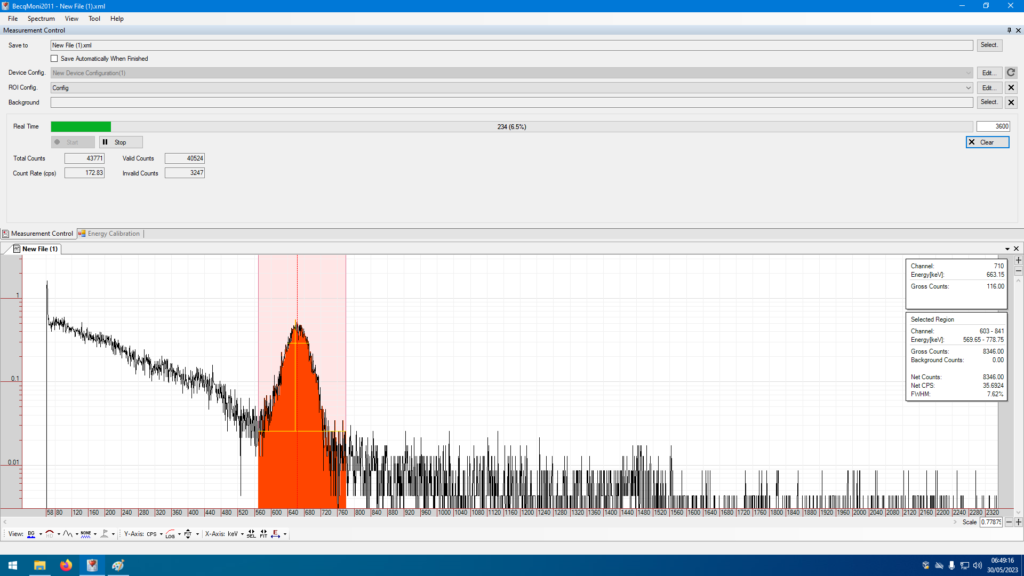
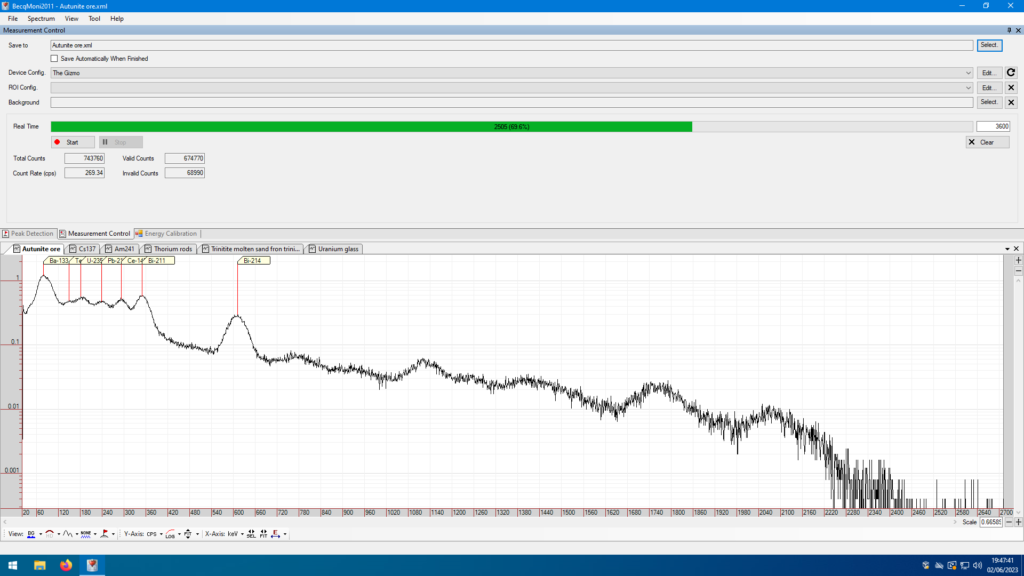
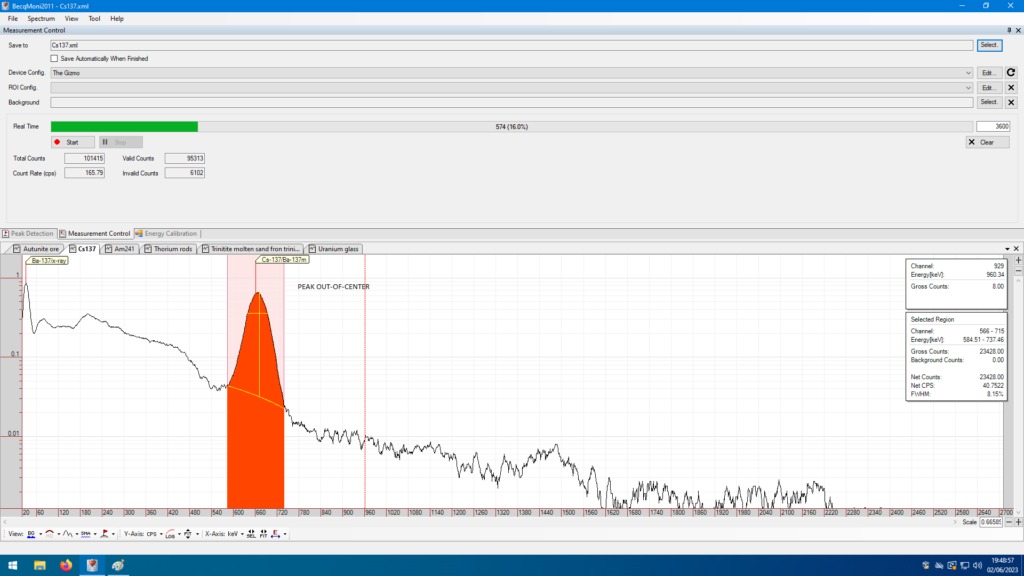
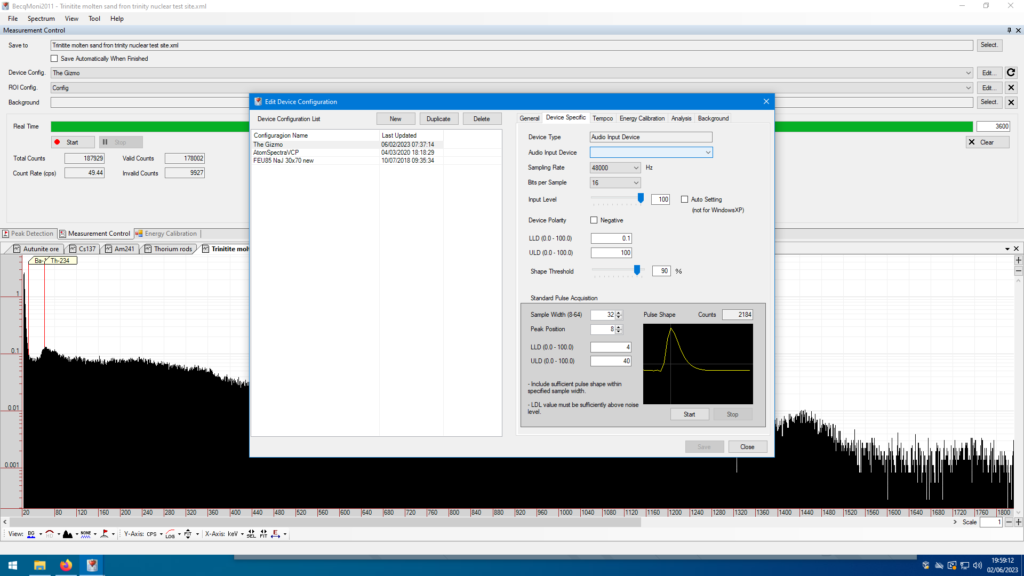
The first test, after connecting the crystal module to the main PCB board, was conducted with the BecqMoni MCA. I proceeded as usual: initially using a Cs137 source, and then a natural Uranium ore sample. I calibrated the audio gain of the line-in and allowed BecqMoni to sample the pulse shape and generate some spectra.
Something even more interesting was testing the device with the USB OTG of my old rugged mobile phone using the Atom Spectra APP. It worked remarkably well.
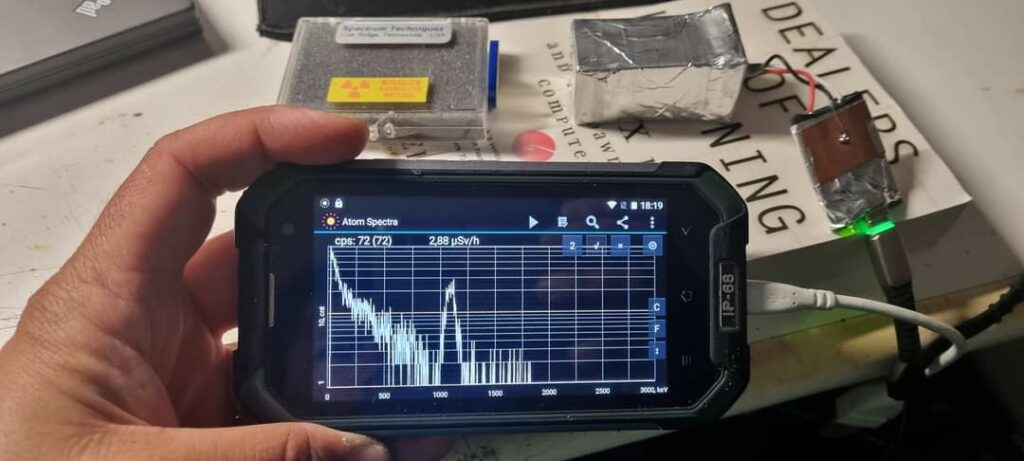

The mobile phone, thanks to its USB Master capabilities (USB OTG), feeds current to the device and uses it as an external audio card. This allows the use of my new spectroscopy device everywhere. This is why I call it ‘Ultra portable’. Its size, resolution, high efficiency, and use of composite materials make it an innovative product.
8. Final assembly and testing
The device was extensivelly tested with BecqMoni, Theremino and PRA audio software-MCA.